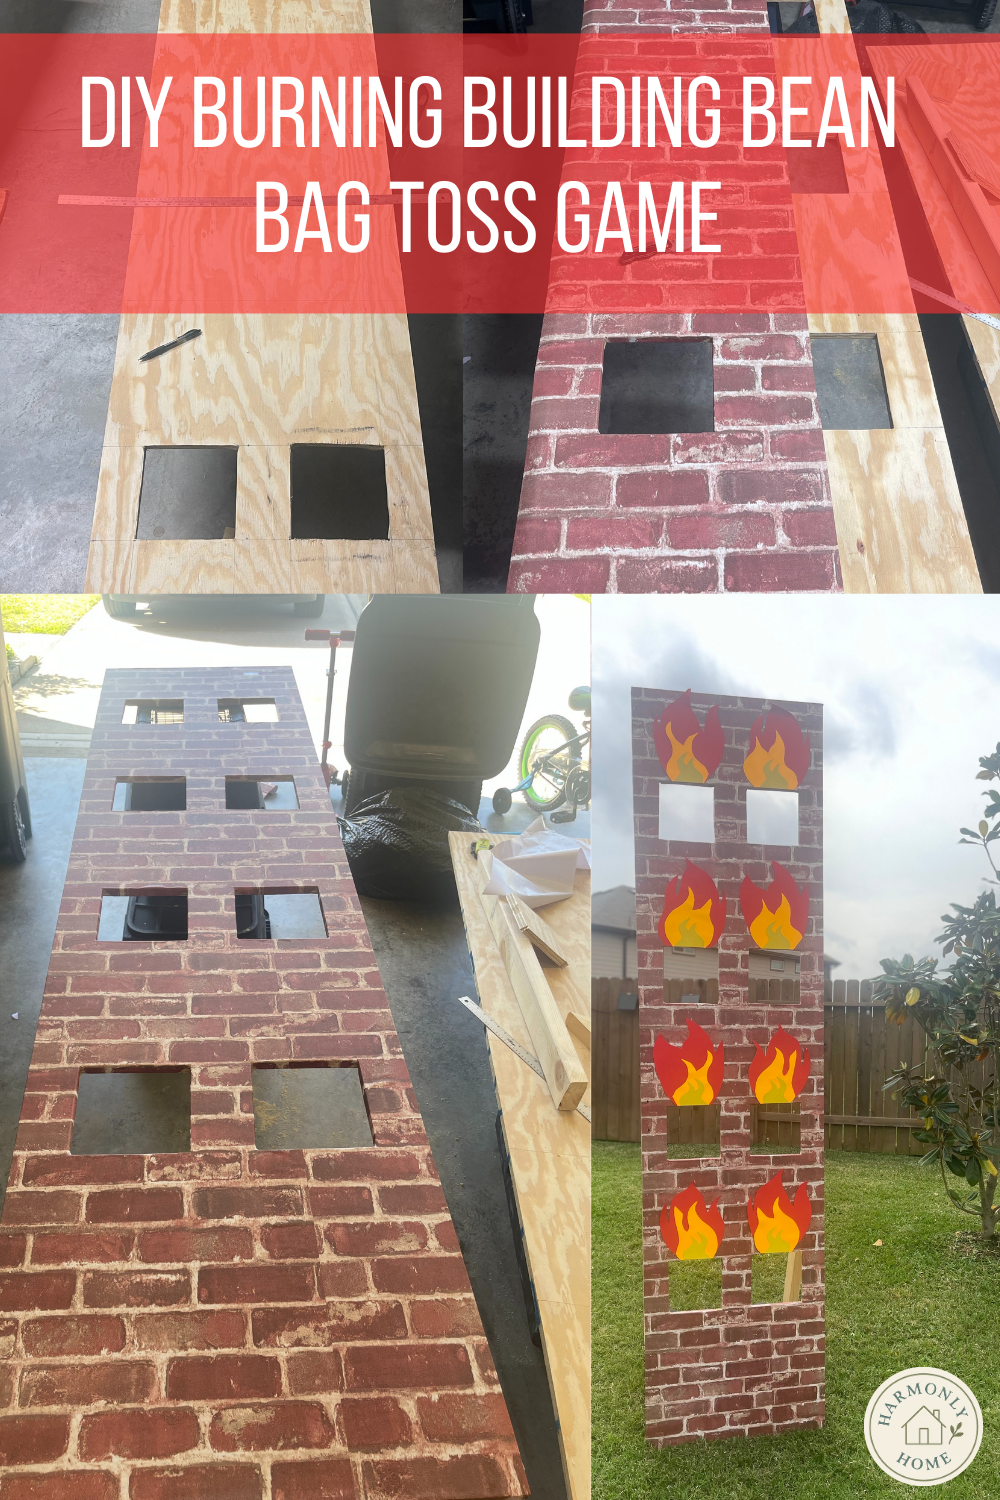
How to Build a Burning Building Bean Bag Toss for a Firefighter Birthday
This post may contain affiliate links, meaning I get a commission if you decide to make a purchase through my links, at no cost to you. Please read my terms of use policy for more info.

Our oldest son has been obsessed with firefighters, firetrucks, and anything fire-related for almost a year now. He was a firefighter for Halloween and has worn the costume regularly ever since—even to the livestock show and rodeo! So, when his 4th birthday came around, it was no surprise that he requested a firefighter-themed party.
We had family and close friends traveling in to celebrate with us, so we decided to host the party at home instead of renting a party space. Honestly, I think we’ll be doing most of our kids' parties at home. It gives you the freedom to get creative, and it saves money.
We briefly considered renting a bounce house, but our son has never been a big fan of them. That’s when I started looking into other fun activity ideas—and that’s how the Burning Building Bean Bag Toss was born!
Here’s how we built this super fun firefighter-themed game that was a huge hit with the kids (and adults!).
Supplies (all underlined are linked for visual reference)
1 sheet of 4x8 ft plywood (we used 0.7" thick for added sturdiness – purchased at Lowe’s)
2x4 planks
17ft
Pencil
Wood screws or nails
Drill (we like the Ryobi one so much, so nice having battery operated tools)
Miter saw (or use a protractor [like this] or angle-cutting trick—more on that later!)
Pocket hole jig (optional if you don’t have one)
Poster board (I found mine at Dollar Tree):
2 red
2 orange
1 yellow
Bean bags (we used these blue ones to represent water)
Instructions
Step 1: Measure and Cut the Plywood
Measure 2 feet in from one 4-ft end of the plywood and draw a straight line down the middle.
Use a circular saw (or table saw) to cut the plywood into two 2x8 ft pieces.
You’ll only need one piece for the toss game.
Step 2: Cut Tossing Holes ("Windows")
Mark your window cutouts with a yardstick and pencil.
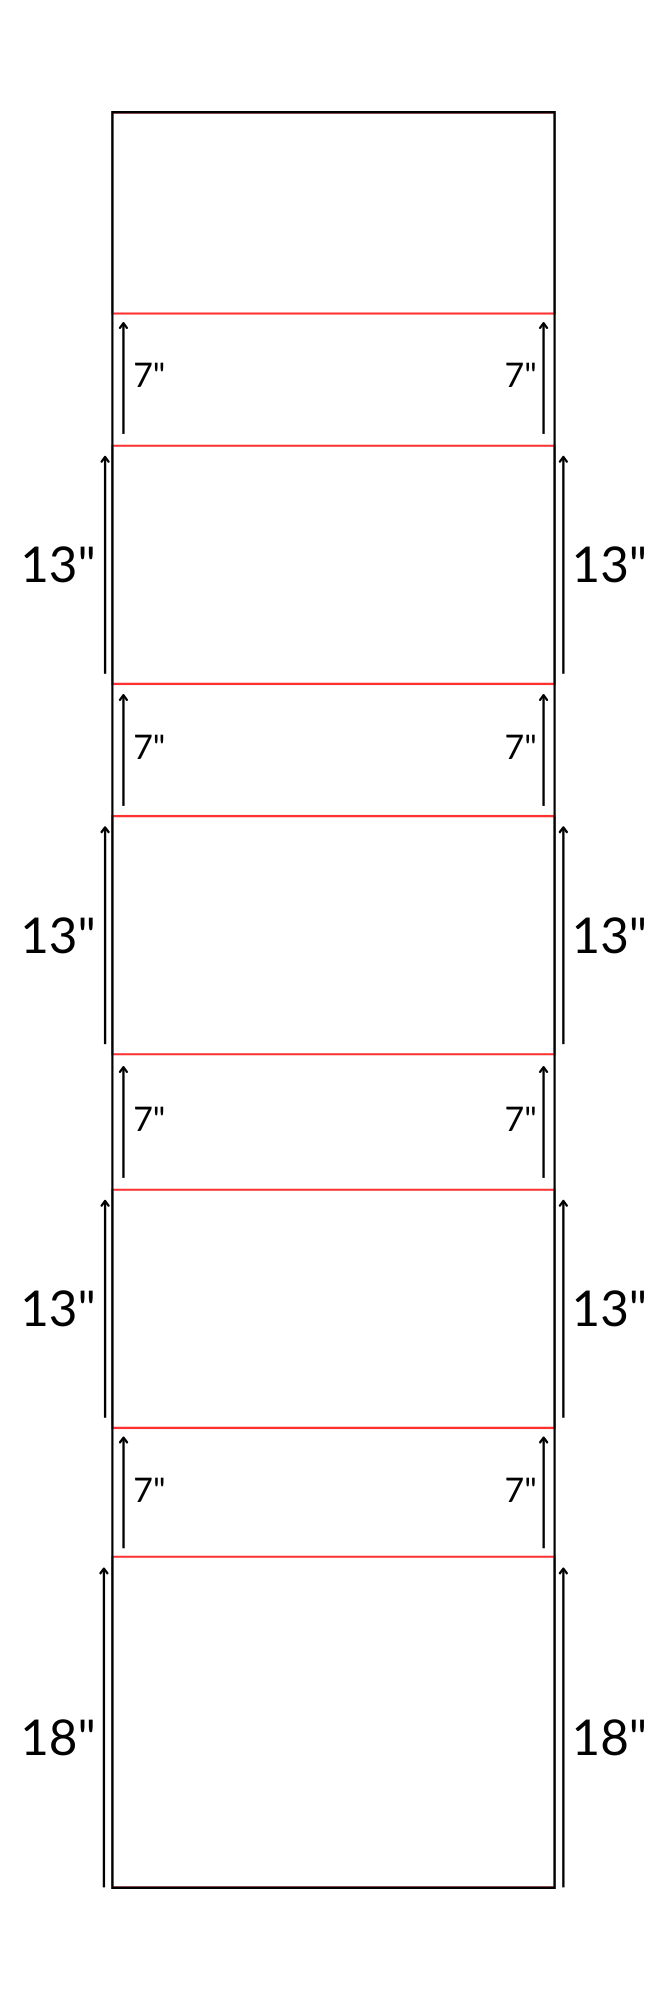
Start by drawing horizontal lines. Make your measurement ticks on each side then connect them using your yardstick as a straight edge, ensuring the are level. Use this diagram from your measurements, you’ll be making the red marks.
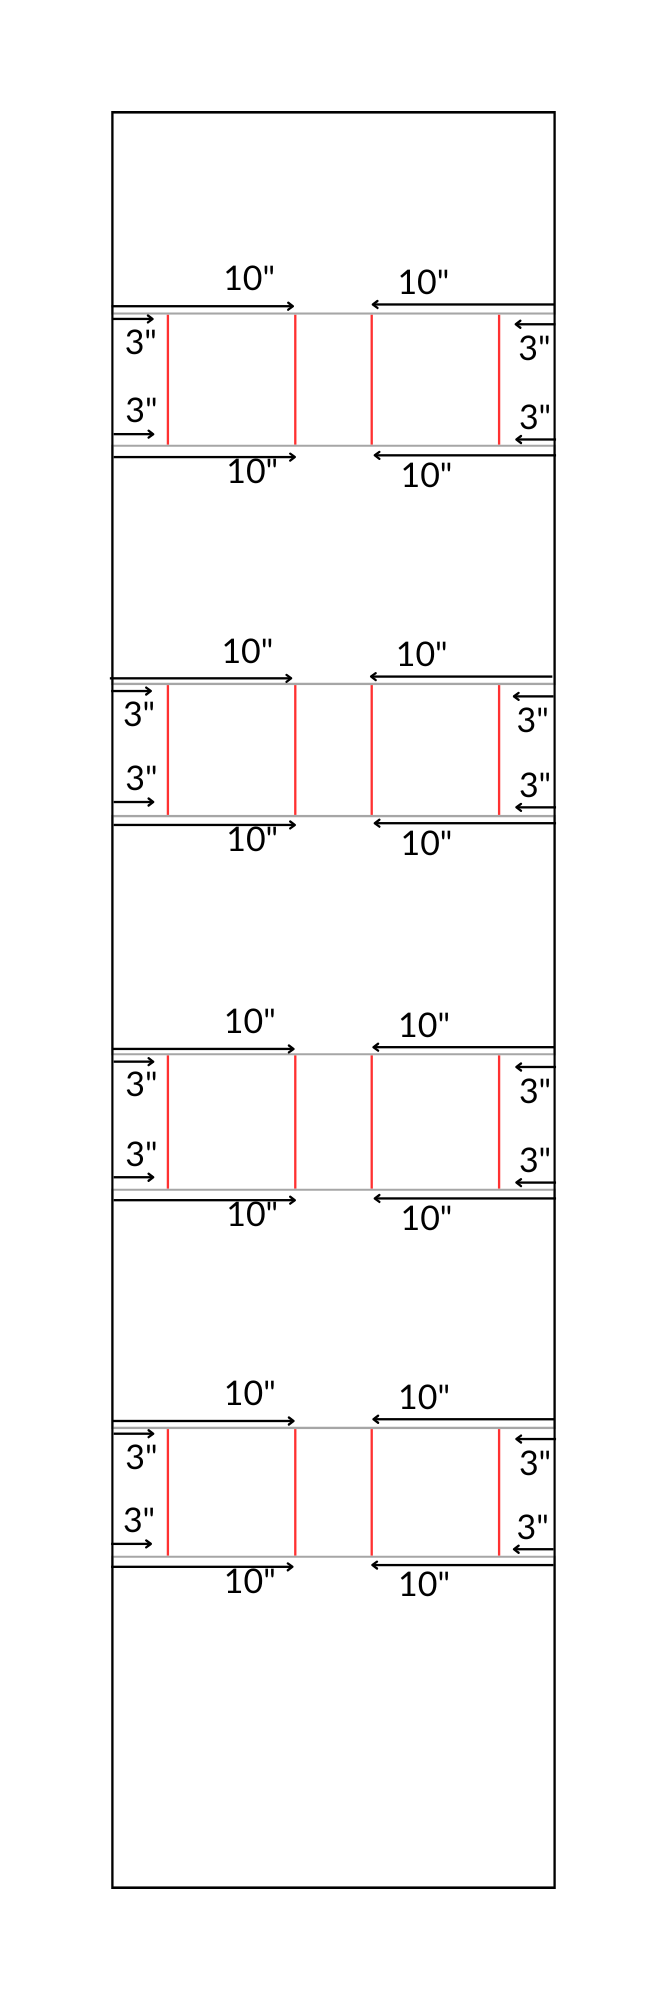
Then vertical ones to create evenly spaced squares. Once again, make your measurement ticks on each side then connect them using your yardstick as a straight edge. Here’s a diagram for these marks.
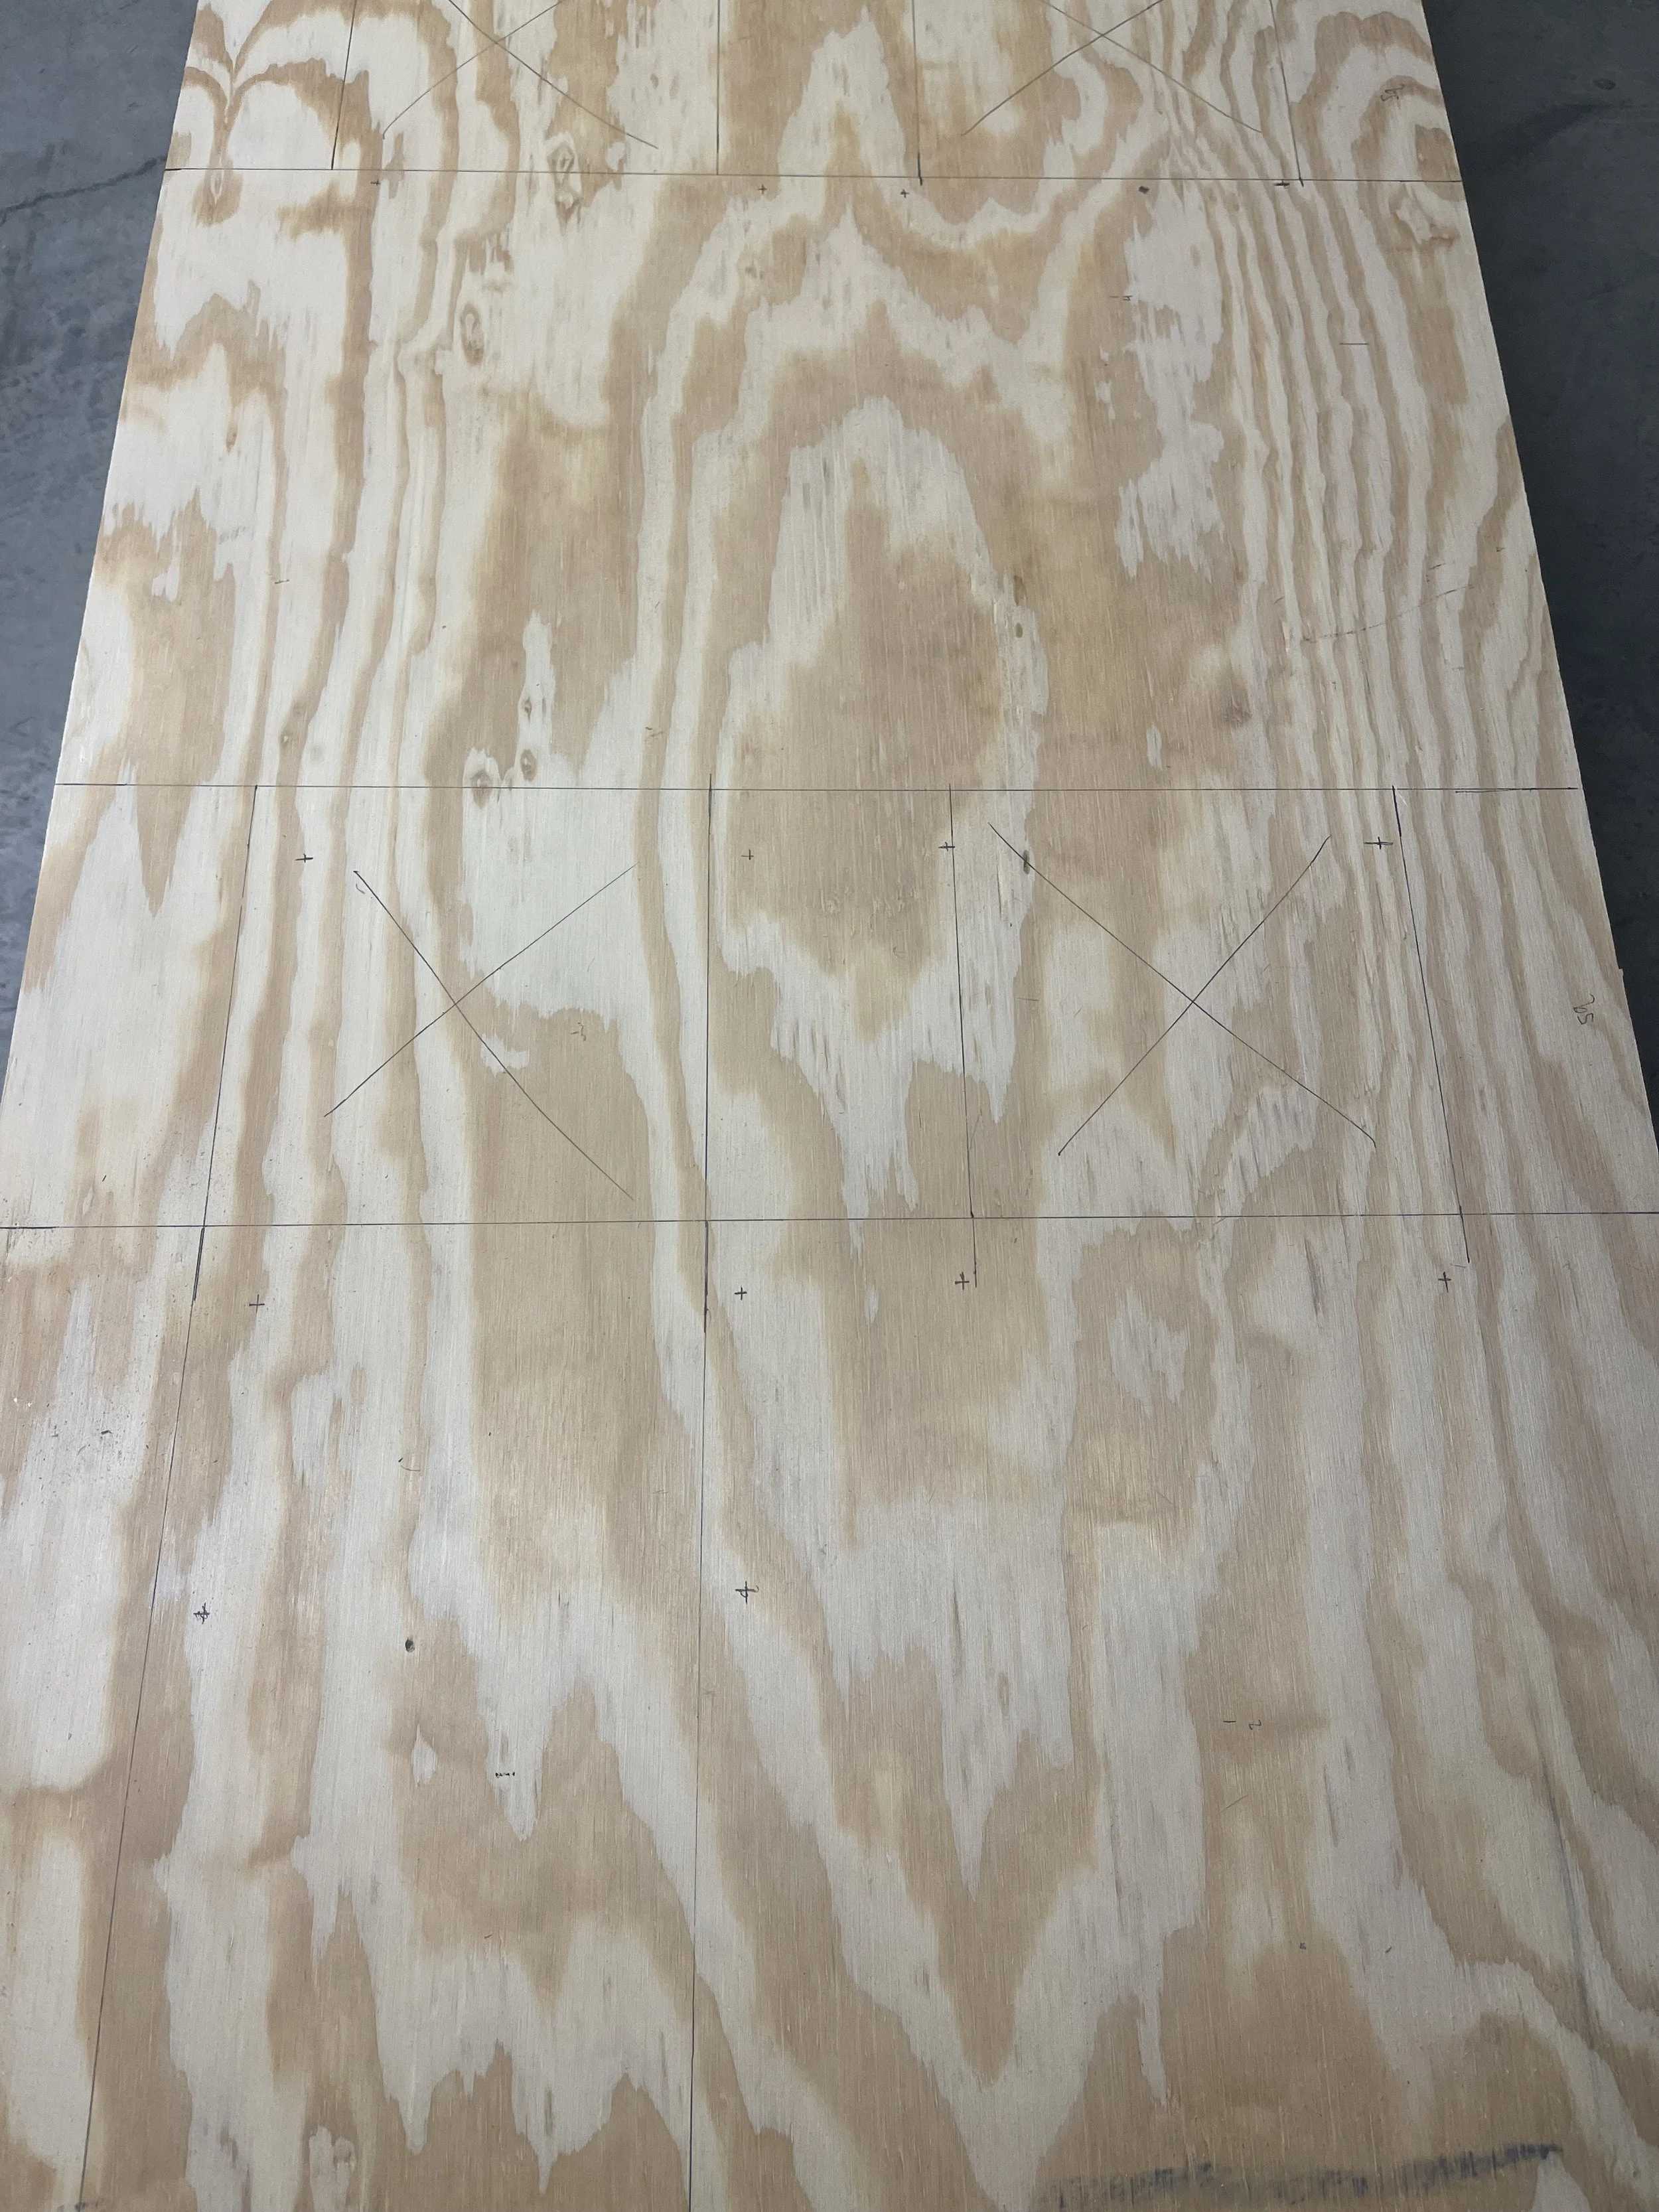
The squares with an “x” are what we will cut.
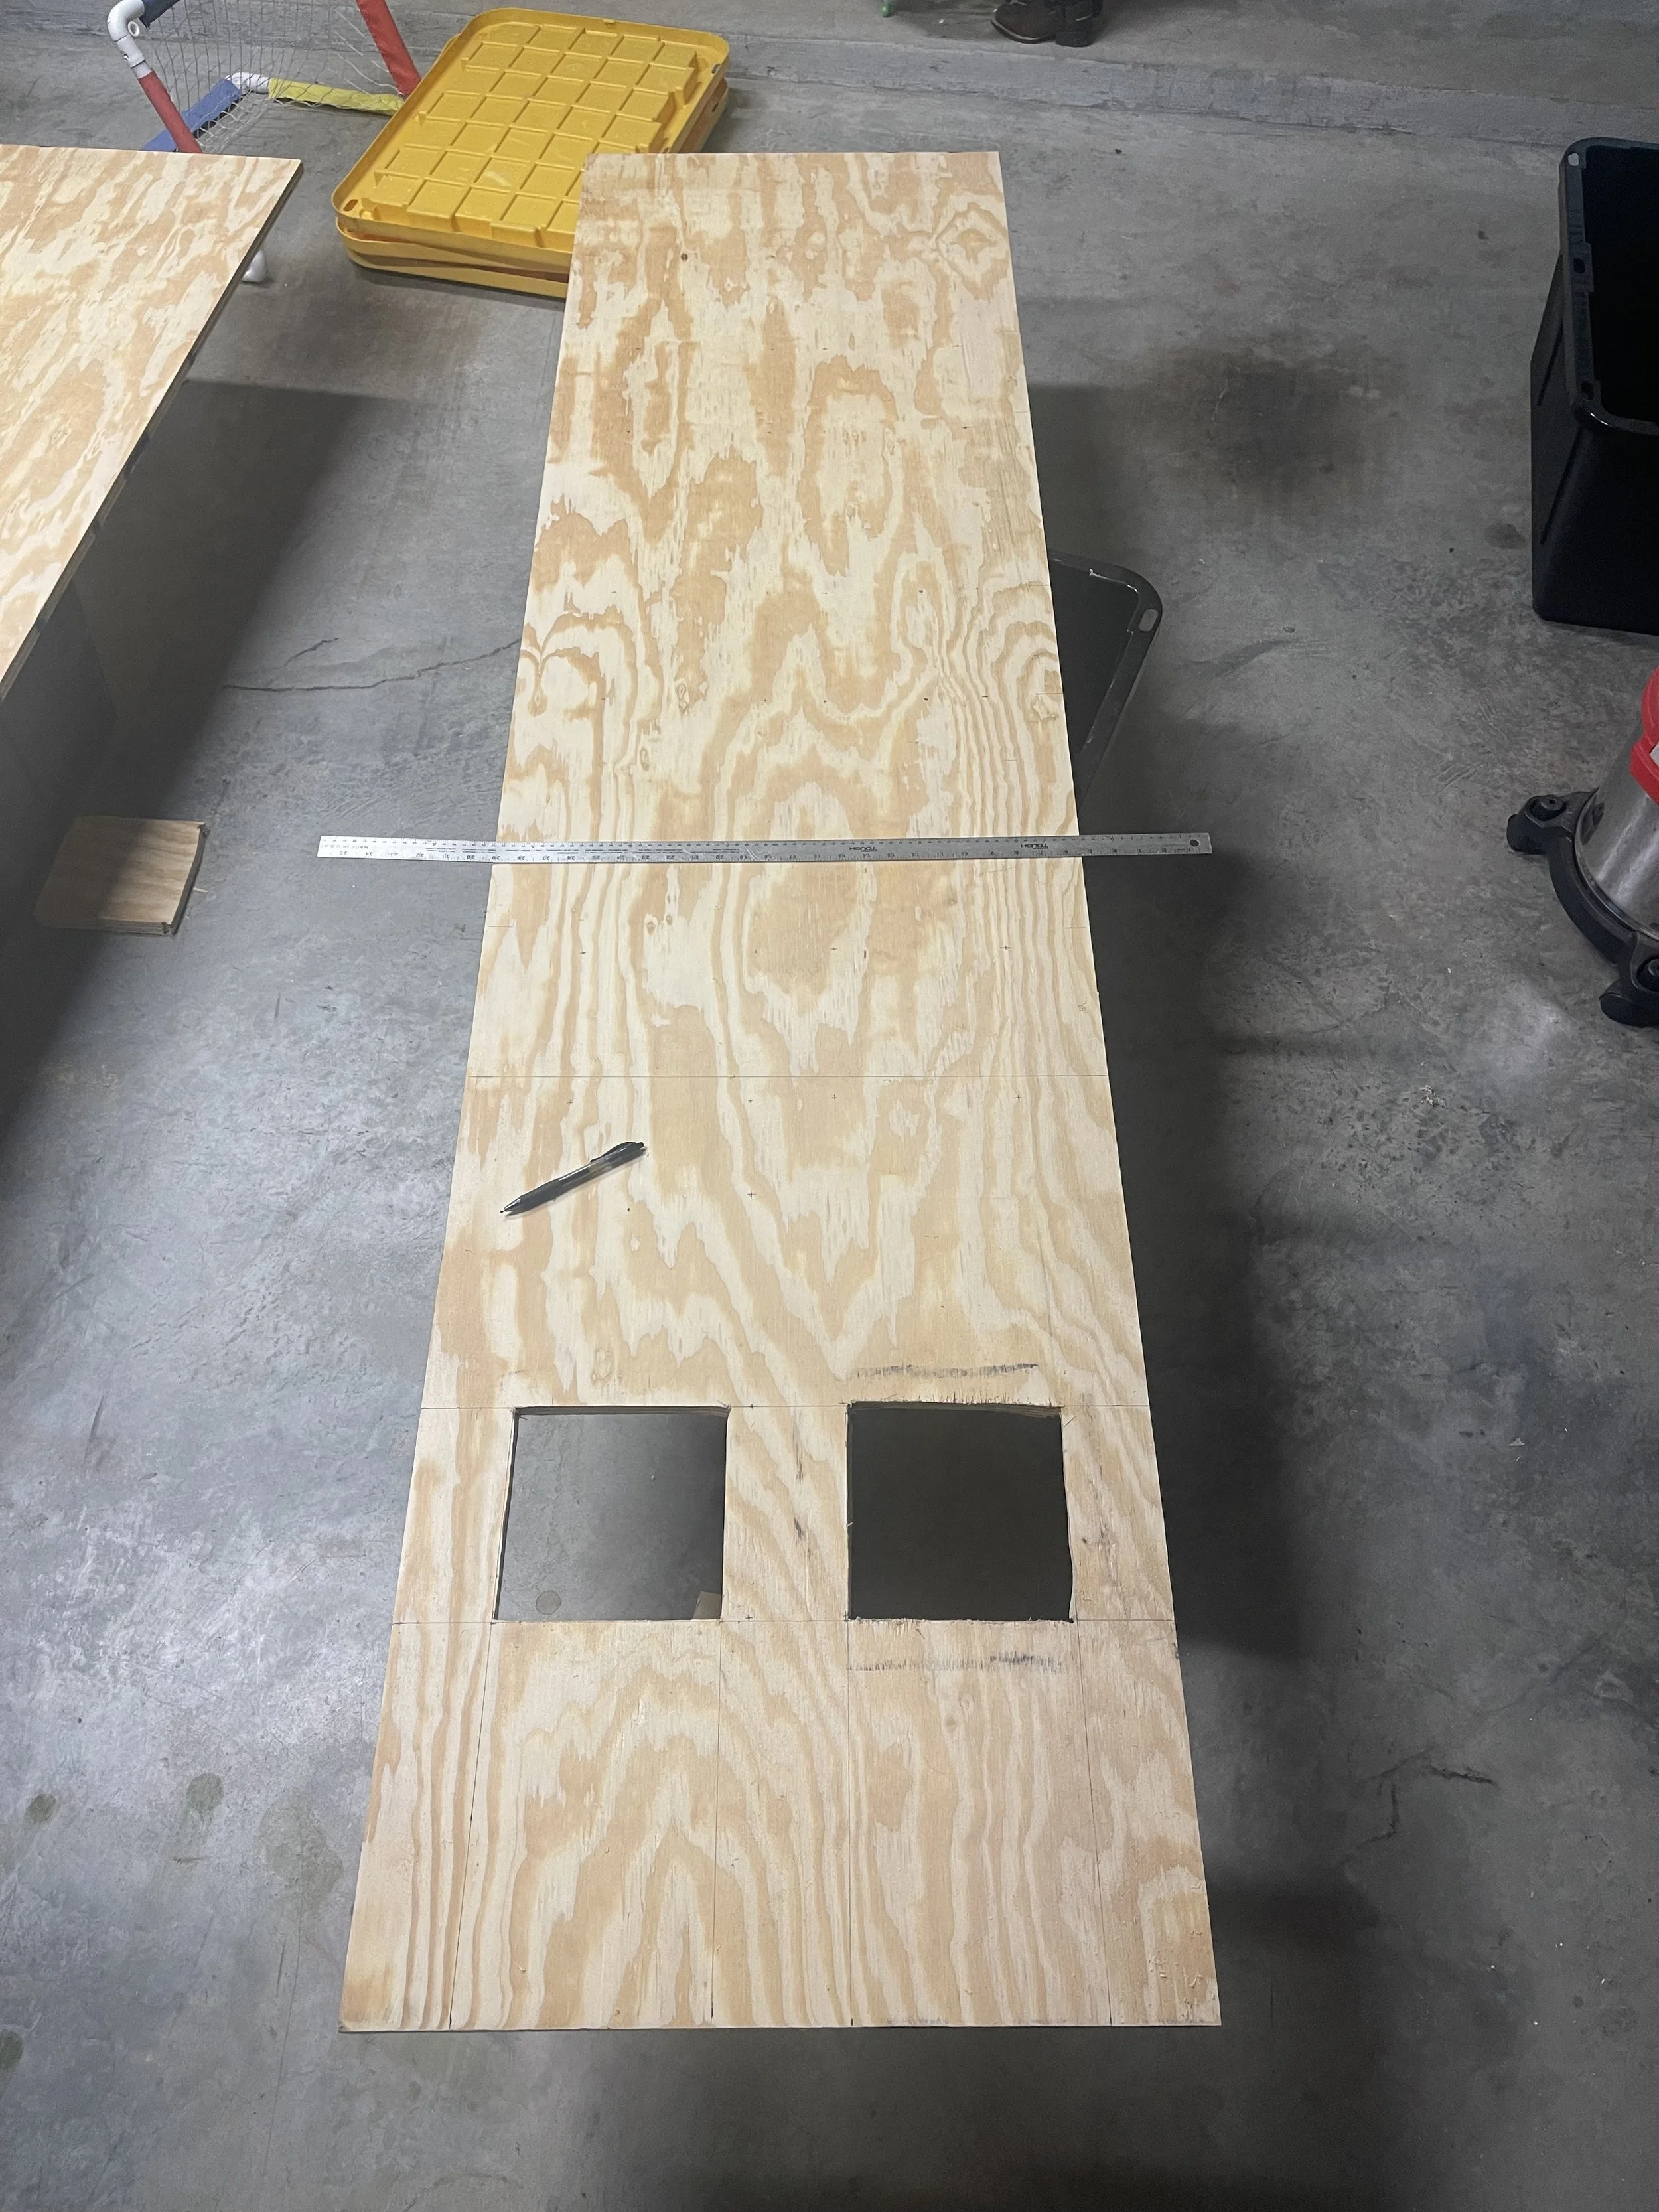
Tip: Make squiggly marks, or an “x”, inside the squares to remind yourself which sections to cut out.
To cut the squares:
Use a jigsaw to follow the marked lines,
OR
Use a circular saw for the straight cuts and clean up the edges with a jigsaw. My hubby did this and it went so much smoother!
Step 3: Apply the Brick Wallpaper
This roll of brick wallpaper was just enough to cover one 2x8 panel. If you want extra wiggle room, order two rolls.
Cut wallpaper strips to match the height of your plywood. You'll need two strips to cover the full width.
Lay your plywood flat (I used storage bins to lift it off the ground, a work/saw table works well too).
Peel and stick the wallpaper slowly, smoothing it with a wallpaper tool. I started from the bottom and worked my way up.
After applying both strips, use a utility knife to cut an “X” into each window hole. Fold back the flaps and stick them to the back side of the board.
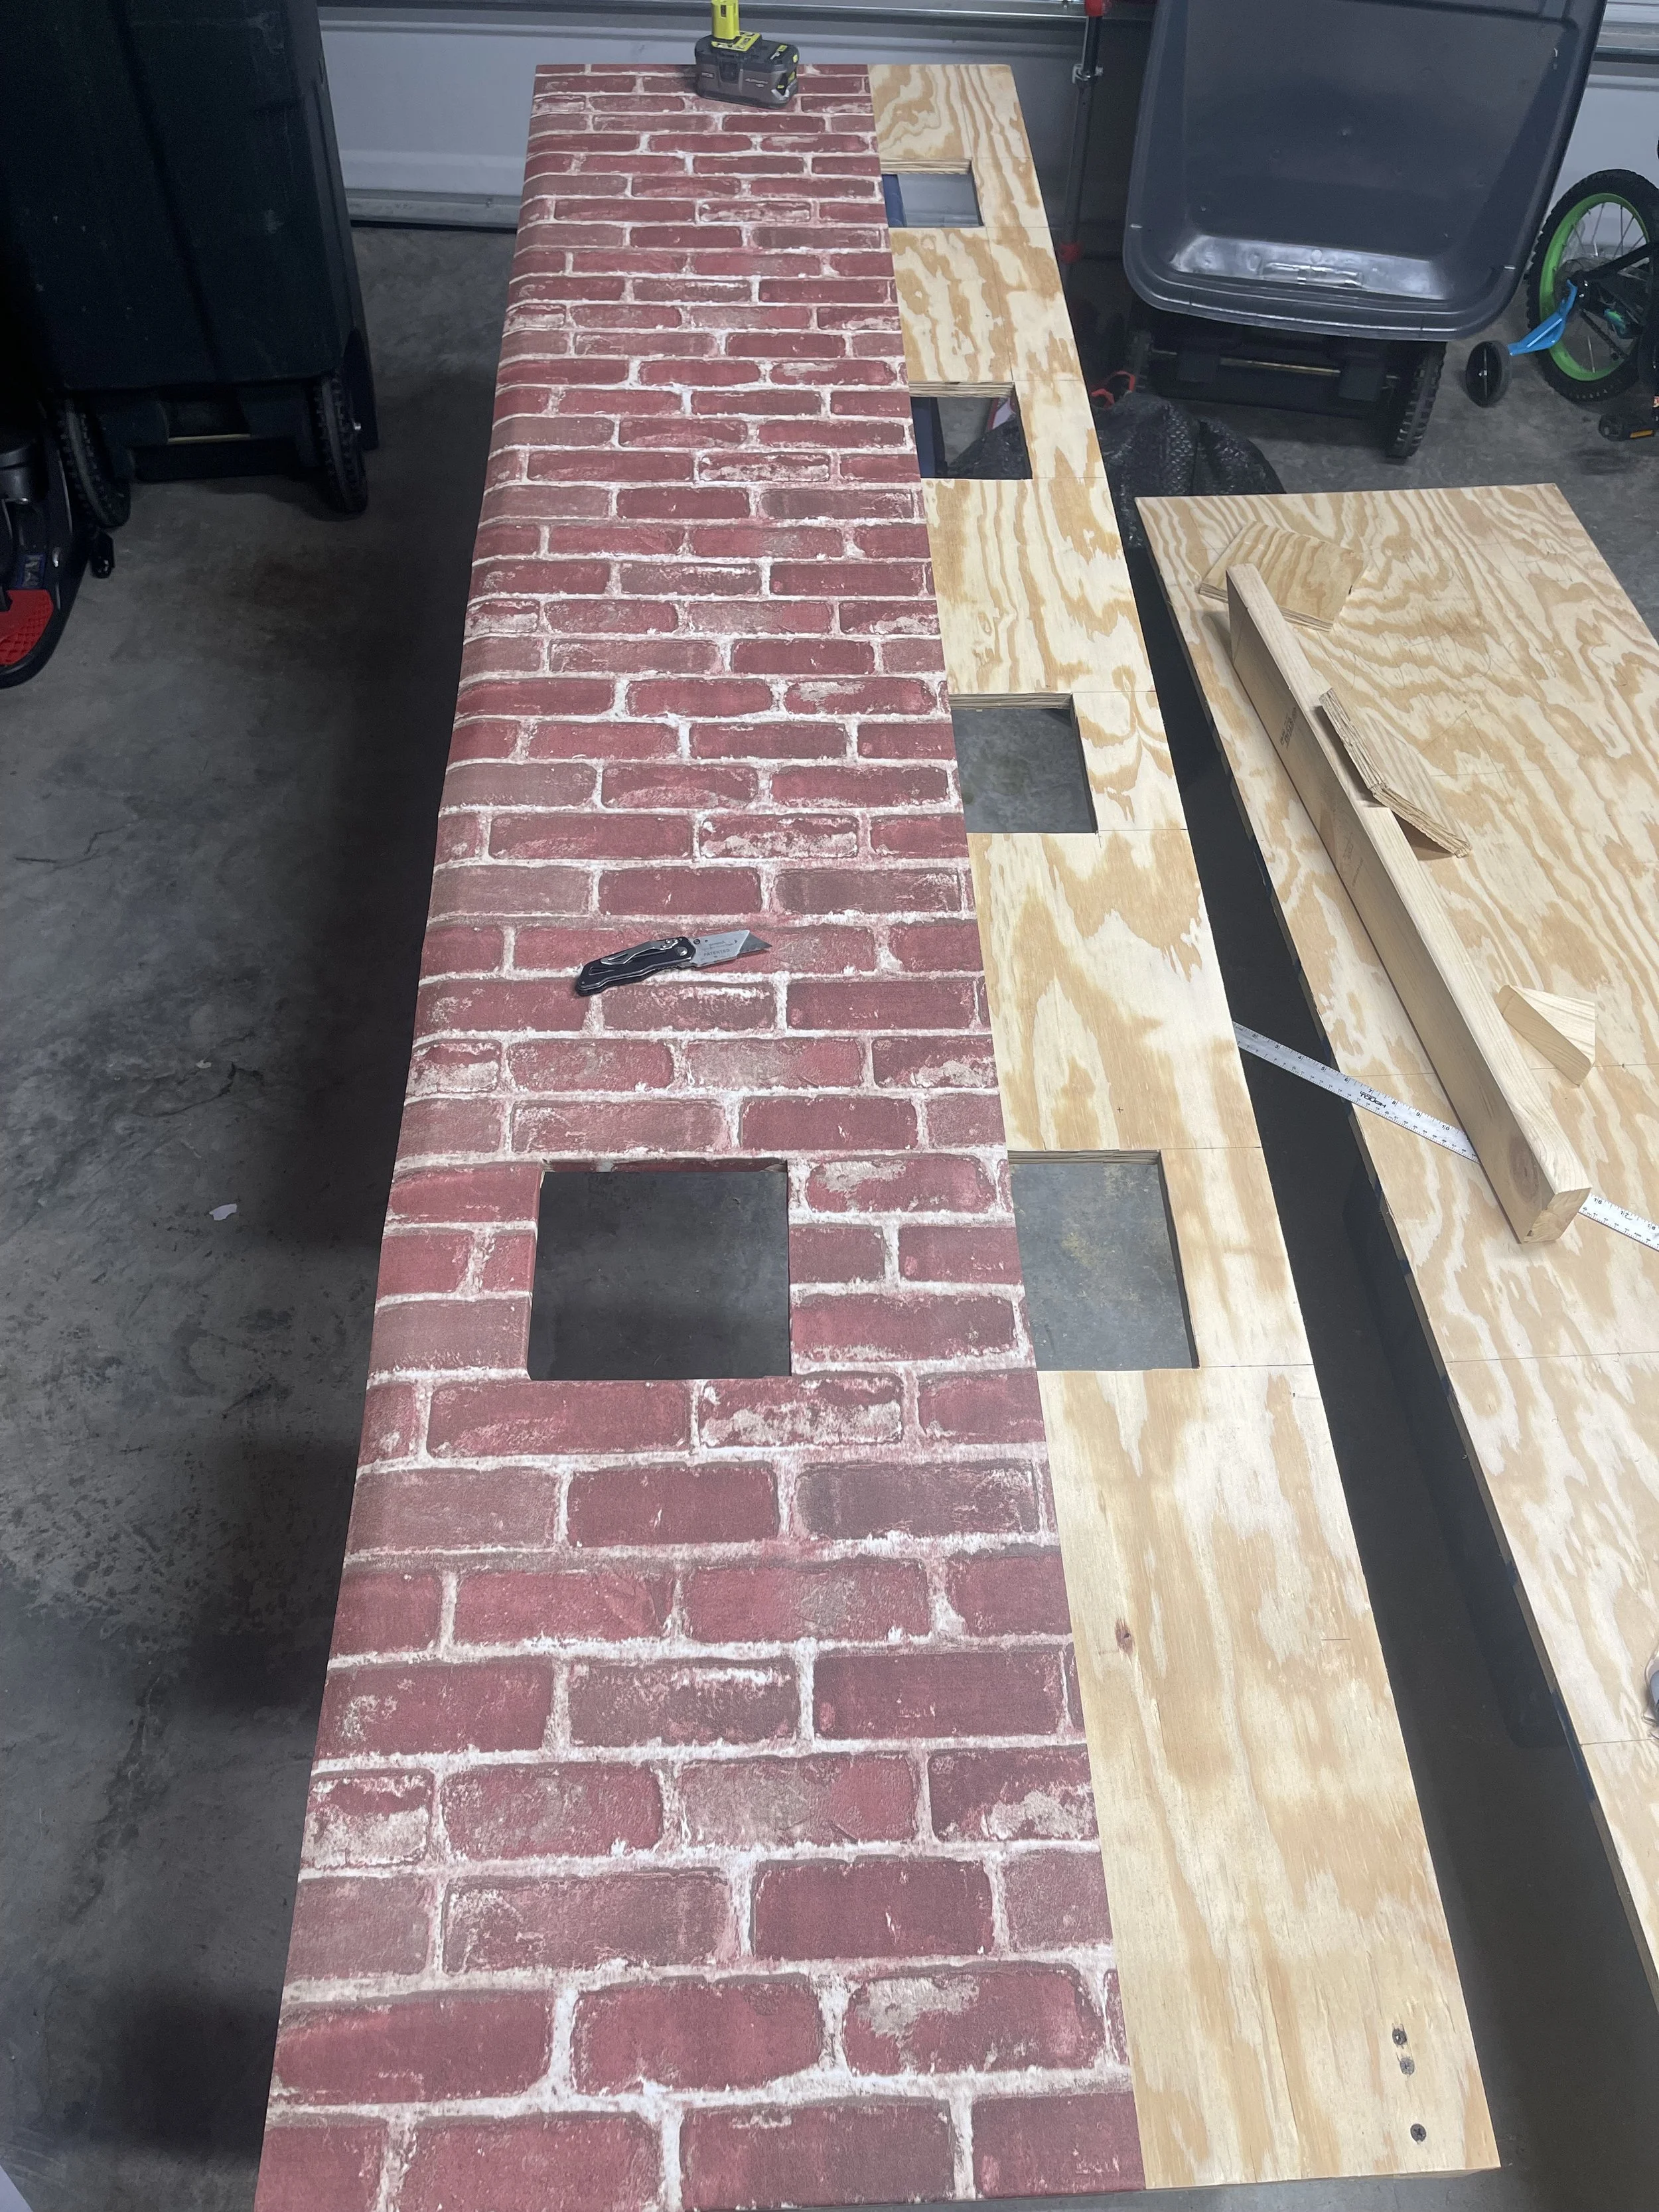
This was after my first strip. I didn’t want the seam straight down the center, but still left some extra on the edge to wrap around for a finished look.
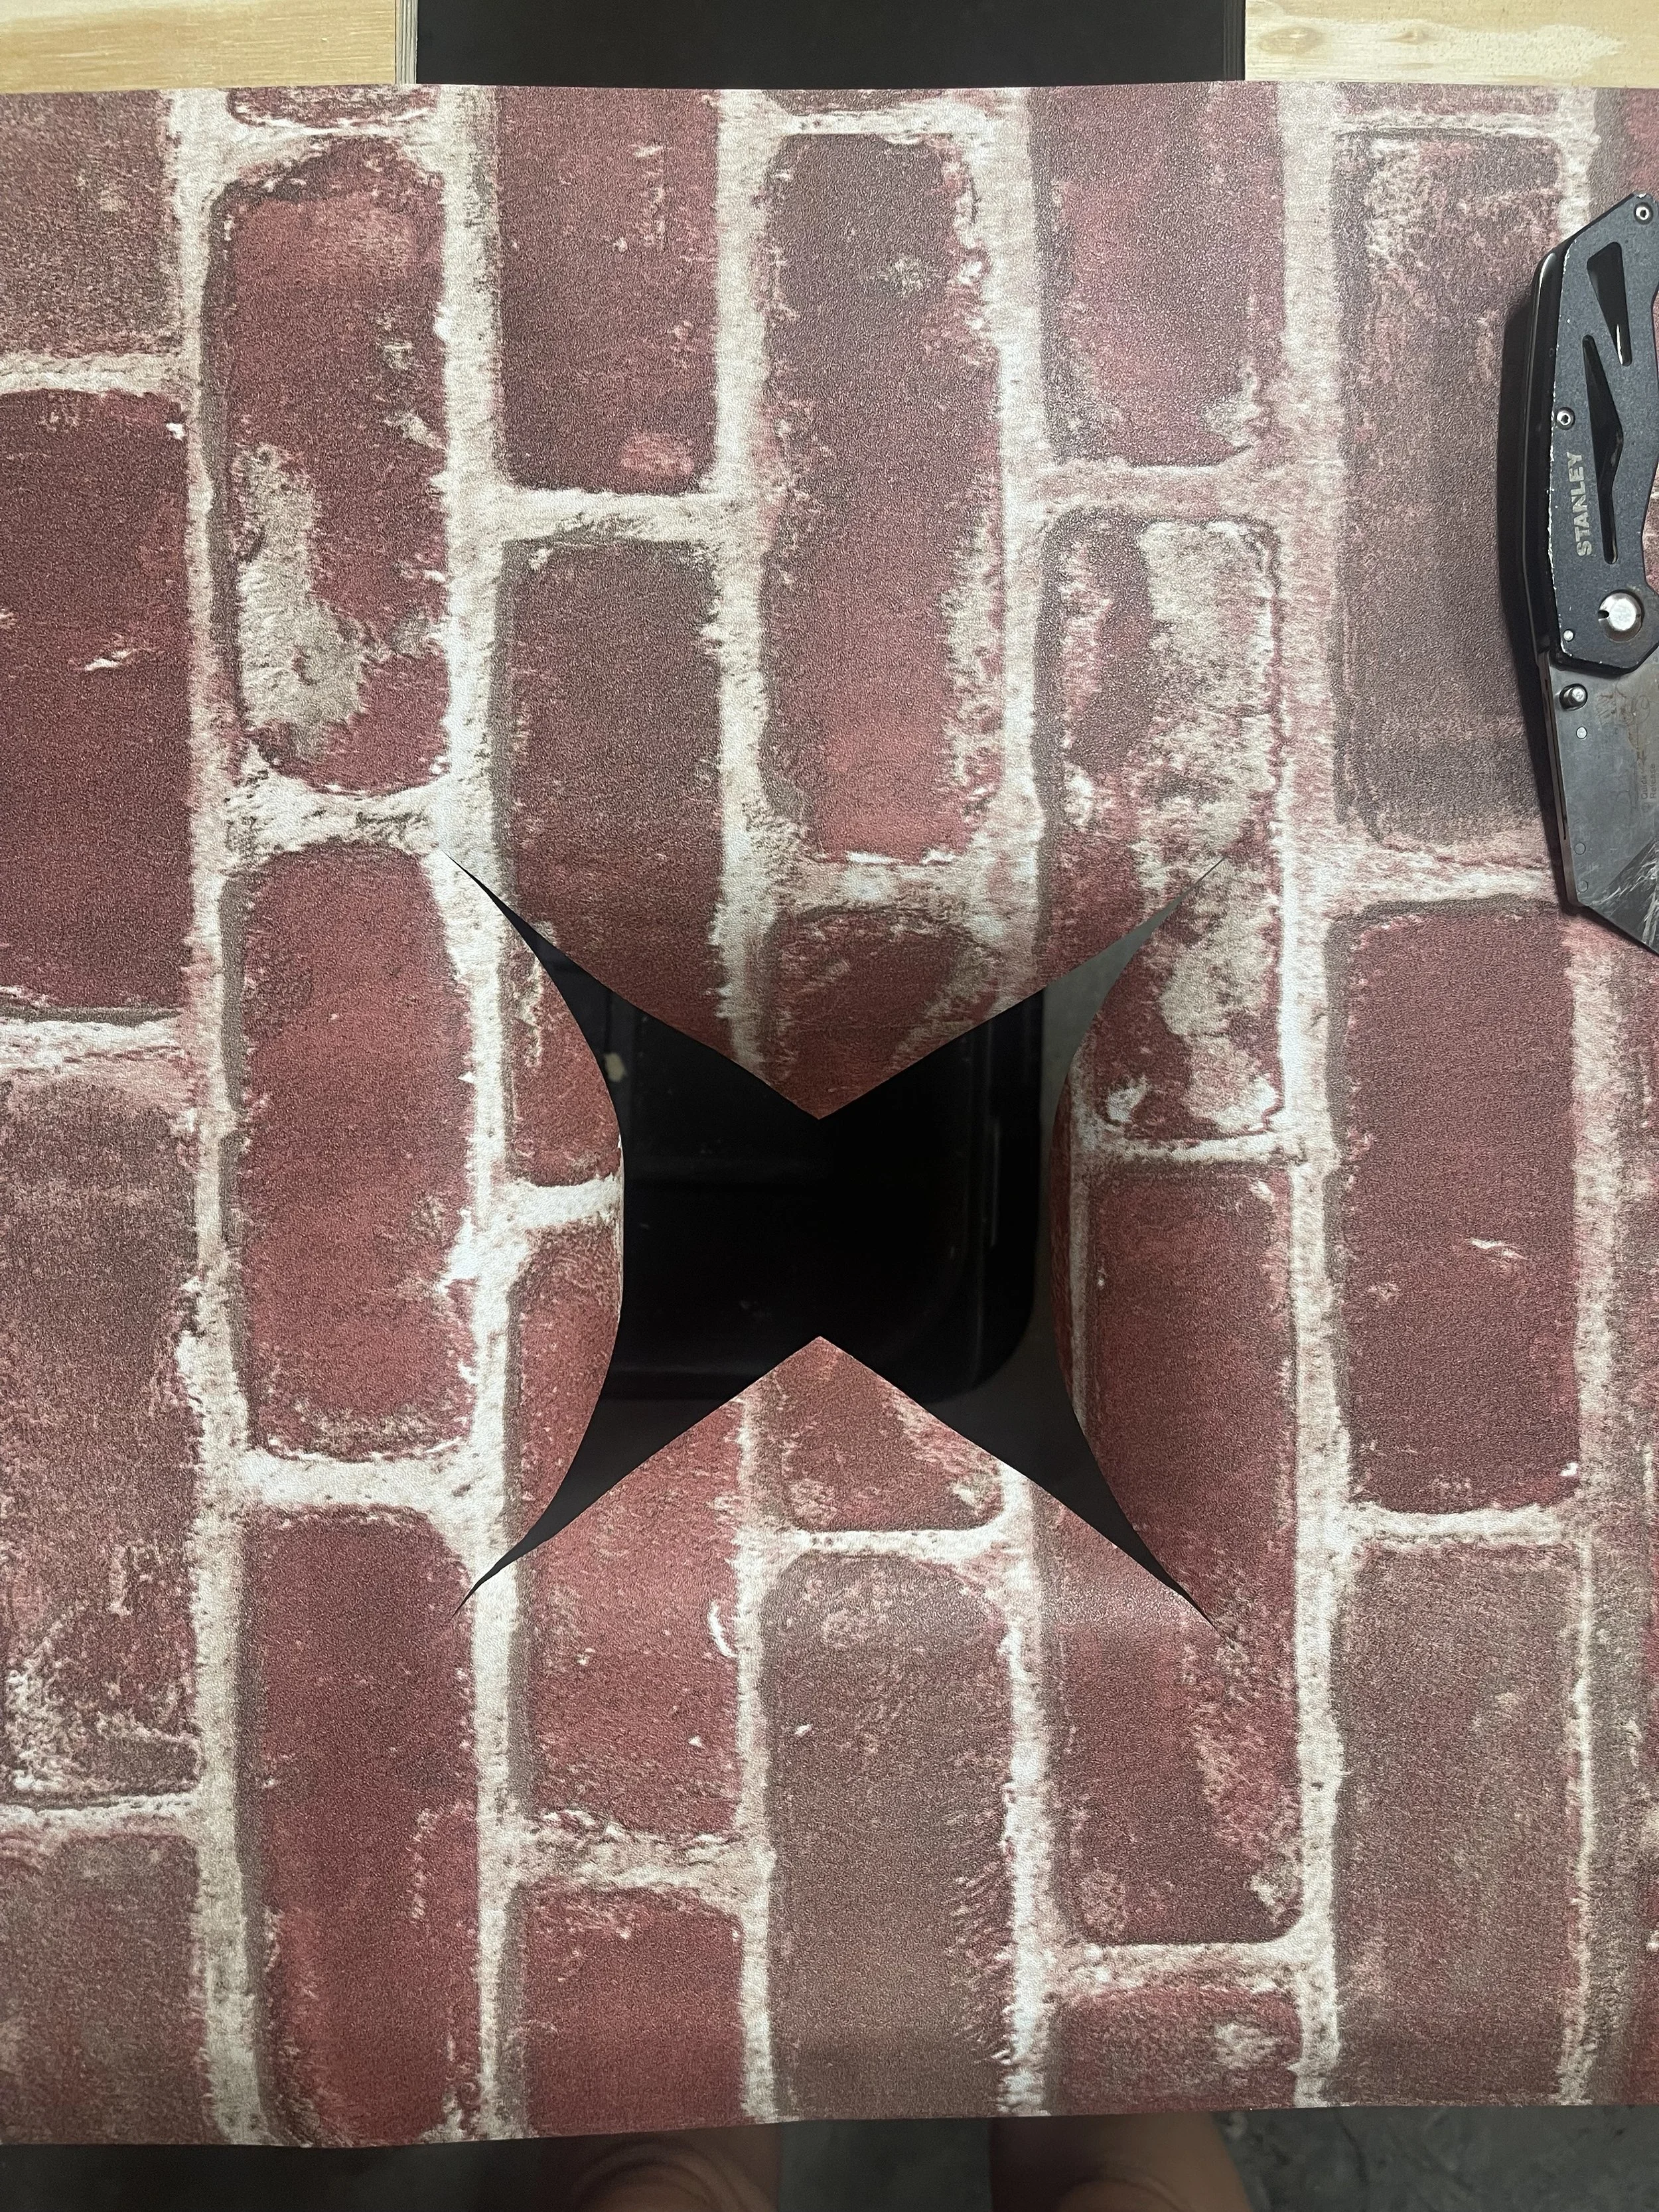
What the “x” cut with your utility knife will look like, super easy to then fold the edges over the backside.
Step 4: Build and Attach the Base
Your final set up attached to the plywood will look like this from the side:
Cut your 2x4s:
Two pieces at 2 ft
Two pieces at 25”
Two pieces at 51”
Assemble the base:
Use the 2ft and 25in pieces to build a rectangular frame for the base.
Attach this frame to the back bottom edge of your plywood. One of the 2 ft boards should sit flush against the plywood.
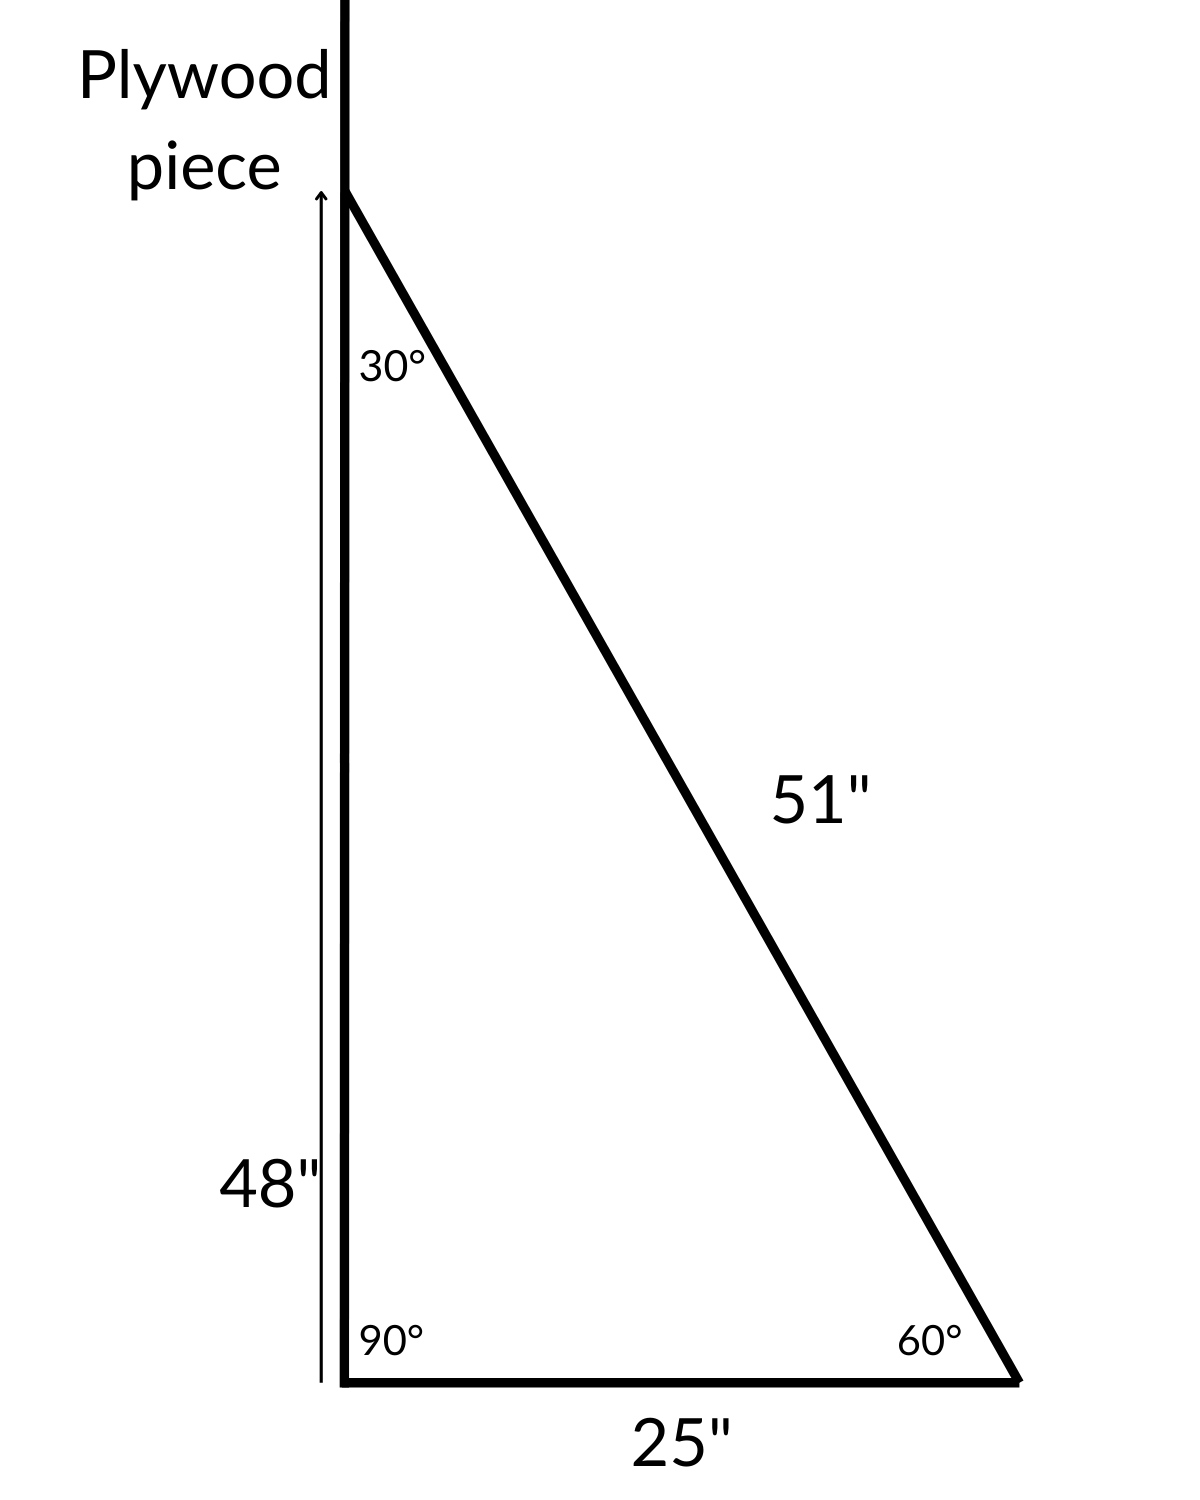
Angle cuts for support:
On each 51" piece, cut one end at a 30° angle and the other at 60°. A miter saw is the easiest way to cut the angles, or you can use a tool like [this]. If you do not have either, check out [this] fun video.
Attach the angled pieces from halfway up your plywood board to the base frame.
Easiest method: use a pocket hole jig like this one.
No jig? You can carefully hollow a small notch with your drill to guide your screw in (this is fine for short-term use).
Step 5: Create and Attach the Flames
Stack your poster boards by color.
Freehand flame shapes (or print out three different sized outlines).
Cut:
8 large red flames
8 medium orange flames
8 small yellow flames
Layer and glue: red on bottom, orange in the middle, yellow on top.
Glue each layered flame to a tossing hole, giving the look of fire coming from a window.
Step 6: Set Up and Enjoy!
Place your finished game in the yard or play area, grab your bean bags, and have fun! We had an unusually windy day of the party so we plopped down some weights on the base frame just incase. This game was a huge hit at our party and added so much personality to our firefighter theme.
You did it—now stand back, admire your hard work, and toss a few bean bags to celebrate. 🔥🚒